Catering: Healthy Mini Appetizers


Don’t let your guests go hungry.  These appetizers will ensure that your guests are fulfilled until the party starts.Food can add so much color to your wedding so don’t be afraid to pick things that are delicious and pretty. These bit size minis are on the lighter and healthier side  so your guests won’t feel too full before they sit down to dinner.
Get These Items
1. Mini Spinach Pizzas, Martha Stewart Living
2. Bite Size Greek Salad, Cooking With My Kid
3. Appricots and Cheese, My Recipes
4. Cucumber Cups, Celebrations at Home
5. Red Peppers and Hummus, Frost Me
6. Pesto and Tomatoe Bruschetta, Recipe
7. Antipasto-Sausage, Food Network
Get These Items
1. Wrapped Mango Bites, Southern Living
2. Veggie Apps, Brennan Nicole
3. Bite Size BLTS, Ourohio
4. Bacon Wonton Wraps, Inspired Taste
5. Matzo Pizza, Skinny Taste
6. Japenses Shrimp Avocado Appetizers, Weight Watchers
7. Low Fat Jalapeno Poppers, Skinny Taste
Get These Items
1. Rainbow Fruit Kabobs, Shabby Chicks
2. Eggplant Appetizer, Laylita
3. Beet and Goat Cheese Salad Appetizers, Martha Stewart
4. Pears With Goat Cheese, Sweet Potato Chronicles
5. Strawberries and Cheese Kabobs, Frost Me
6. Veggies, LivingLoCurto
7. Veggies, Simple Bites

S’mores Cookie Sandwiches

S'mores Cookie Sandwiches | Cooking Classy
S’moresaholics, like myself, you better watch out for these! These are my idea of a s’more in a soft, melt in your mouth cookie sandwich form. I’ve made s’mores cookies in the past but none this good. I debated about which kind of marshmallow filling to add to the center, really you can use the marshmallow variety you prefer (marshmallow frosting, marshmallow fluff or a regular toasted marshmallow). The one I chose has just always reminded me of melted marshmallows and it’s consistency stays as such, it doesn’t set and get chewy like a real marshmallow does once it cools. If you are planning on doing S’mores over a campfire, then I would definitely recommend using a real marshmallow that you’ve toasted over the campfire and enjoying them warm and melty. You could also use a homemade marshmallow fluff, I have just found it too firm for piping and it’s a serious pain to spread. I’d recommend storing them at a cool temperature (technically I’m not sure what the safest way to store them would be since they have egg whites in the frosting, probably the fridge). I recently discovered the best lighting in my house for pictures lately is my garage. Lets just say those stacked cookies in 95+ degrees = very challenging. They were the Leaning Tower of Pisa, with that said, keep them cool until ready to serve and don’t stack them. Once you go to serve them feel free to enjoy them in the heat of a mid summers day. Mine were a gooey, melty, delicious mess in that heat. Just like a real s’more. Yeah, I’m going to have a hard time forgetting about these cookies once they are gone.
Make these S’mores Cookie Sandwiches and trust me, they’ll be gone in no time. When winter rolls around this is a recipe you’ll want to keep handy, you get all the flavors of a s’more but in the comfort of your home in the middle of a snowy winter. Enjoy S’mores lovers!
S'mores Cookie Sandwiches | Cooking Classy
Then I got a little crazy and toasted the cookie and chocolate too. The best part of my job – that first bite. Total bliss. Bliss doesn’t come from a relaxing day at the beach or spa or buying a ridiculously fast Maserati. Bliss comes from goodness like this :)…
S'mores Cookie Sandwiches | Cooking Classy

Angel Food Cupcakes

Angel Food Cupcakes | Cooking Classy
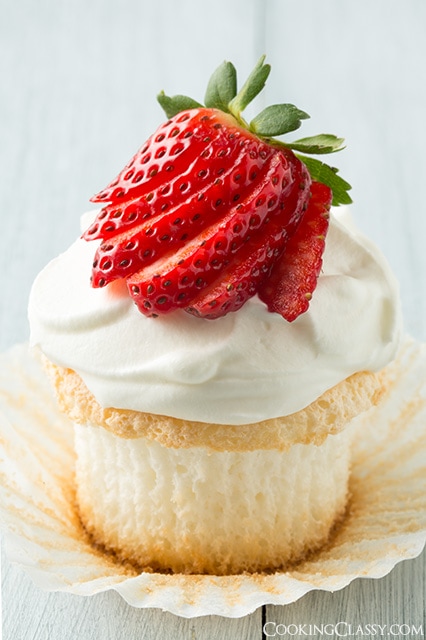
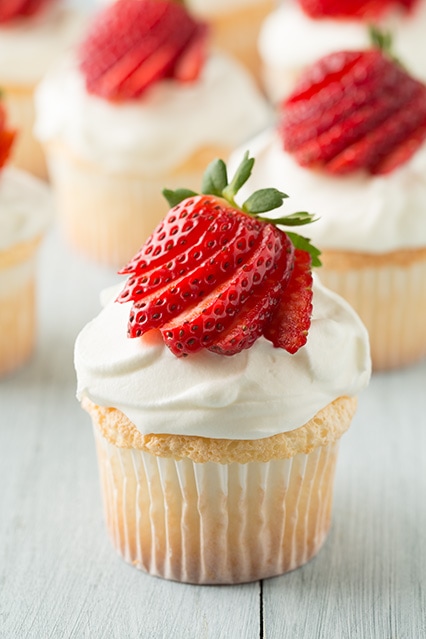
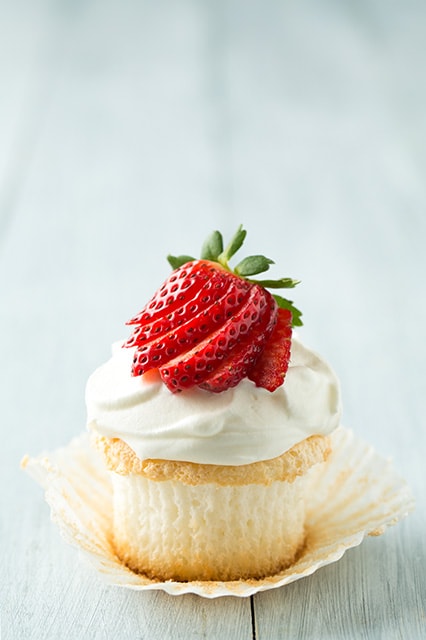
The cupcakes of Heaven. It’s easy to see where Angel Food Cake has been given it’s name. It is gorgeously white, fluffy as clouds and delicately soft and it’s simply divine. It’s made with just a few basic ingredients but when properly prepared it creates something all it’s own. I love cupcakes, plus I don’t own an angel food cake pan (and I’m assuming most everyone else doesn’t either as it doesn’t seem to be a common kitchen item) so I thought angel food cupcakes would be more fitting for a made from scratch angel food cake recipe. To me, these tasted far better than any store bought angel food cake I’ve ever had. They also seem to have more moisture so I didn’t feel like I was eating a dried out sponge :).
I topped these with a simple cream cheese whipped cream made from 3 simple ingredients. The cream cheese is the perfect addition to these cupcakes and it will likely remind you of berry cheesecake. Also, I rarely combine vanilla with a whipped cream topping because I love the flavor of cream and don’t want it to be hidden, so some of you may like your whipped cream with a hint of vanilla but I say it’s basically an insult to the goodness and natural sweetness of cream – so leave it out! Just kidding, add it if you’d like but just be sure you make these cupcakes. And as always, Enjoy!
Angel Food Cupcakes | Cooking Classy
Ingredients
    • 3/4 cup + 2 Tbsp granulated sugar
    • 1/2 cup cake flour
    • 1/4 tsp salt
    • 6 egg whites, at room temperature*
    • 2 1/2 Tbsp warm water
    • 1/2 tsp vanilla, coconut, almond or orange extract (I used coconut)
    • 3/4 tsp cream of tartar
Cream Cheese Whipped Cream Topping
  • 1 1/2 cups heavy whipping cream
  • 6 oz cream cheese, softened
  • 1/2 cup powdered sugar
  • fresh strawberries, blueberries or raspberries
Directions
  • Preheat oven to 350 degrees. In a food processor, pulse sugar until super fine, about 2 minutes (if you don't have a food processor caster sugar should also work). In a mixing bowl, sift together half of the sugar, the cake flour and the salt.
  • In a large mixing bowl, whisk together egg whites, water, extract of choice and cream of tartar until well combined, about 2 minutes. Switch to a hand mixer and whip mixture on medium speed while slowly adding remaining sugar to mixture, until medium peaks form. Sift just enough of the flour mixture in to evenly dust the top of the egg white mixture and using a spatula gently fold flour layer into egg white mixture and continue this process until all of the flour mixture has been incorporated (I did this in probably 12 batches).
  • Divide batter among paper lined muffin cups, filling each cup nearly full. Bake in preheated oven 18 - 20 minutes until golden and toothpick inserted into center comes out clean. Cool completely then spread Cream Cheese Whipped Cream over cupcakes just before serving and top with fresh fruit.
  • For the Cream Cheese Whipped Cream Topping:
  • In a mixing bowl whip heavy cream until soft peaks form. In a separate mixing bowl, whip cream cheese until light and fluffy. Add cream cheese to whipped cream along with powdered sugar and whip until stiff peaks form. Store in refrigerator.
  • *I'd recommend working with one egg in a bowl at a time to separate the yolk and white, then pour that separated white into the mixing bowl and continue that process with remaining eggs. I do this simply in case one of the yolks breaks and gets into the whites then you'll only have to toss out 1 egg and not all of them if you can't get the yolk out. You don't want even 1 drop of egg yolk in the cake mixture or it can prevent the whites from whipping to stiff peaks.
  • Recipe Source: cake adapted from Alton Brown's Angel Food Cake, via Food Network. topping - Cooking Classy

Strawberry Cheesecake Chimichangas

Strawberry Cheesecake Chimichangas
Tomorrow morning I’m flying to Austin, Texas for the annual BlogHer Food conference, and I could think of no better sendoff than a southern-inspired sweet that pays homage to a Tex-Mex favorite: chimichangas.
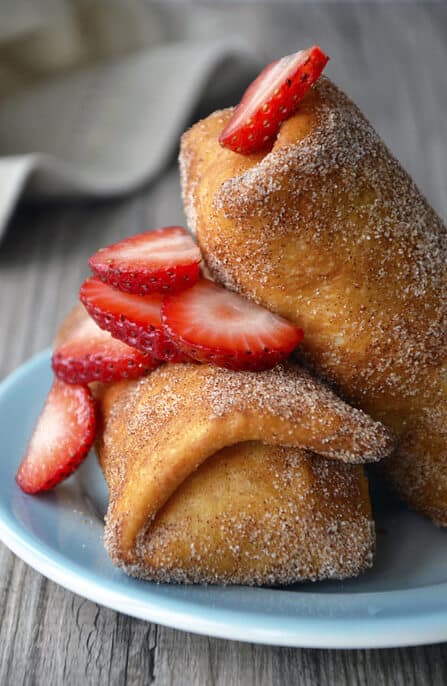
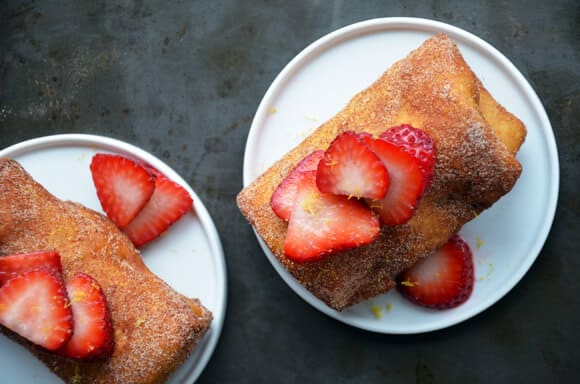
For all those unfamiliar with the dish, chimichangas are essentially deep-fried burritos filled with a variety of savory fillings, such as pulled pork or beef, beans, rice and cheese. But given that I can’t go a day without a bite of something sweet, I dreamt up a dessert version that stars a homemade strawberry cheesecake filling rolled inside flour tortillas. The stuffed tortillas go for a quick dunk in boiling oil and a final swish in cinnamon and sugar. The result is a twist on traditional cheesecakethat swaps pillowy tortillas for the classic graham cracker crust.
But the sweetness doesn’t end there! I’m headed to Austin with the KitchenAid team, and they’re extending a pretty sweet giveaway with the chance to win a KitchenAid Stand Mixer, color of your choice.
KitchenAid Stand Mixer Giveaway
UPDATE: This giveaway is now closed. Congratulations to the winner, Lisa D. (comment #216), who was selected via Random.org!
Make sure you’re following Just a Taste on Facebook, Twitter, Pinterest, and Instagram for all of the latest updates from Austin, and then enter for your chance to win by leaving a comment on this post that answers the following question:
 Which Just a Taste recipe would you make with your new KitchenAid Stand Mixer?
One winner will be selected via Random.org and announced on Wednesday, June 12, 2013. This giveaway closes on Tuesday, June 11, 2013 at 12 p.m. EST and is open to U.S. participants only. The winner will be contacted via email, so please include a valid email address in the email address entry box.
Cheesecake Filling
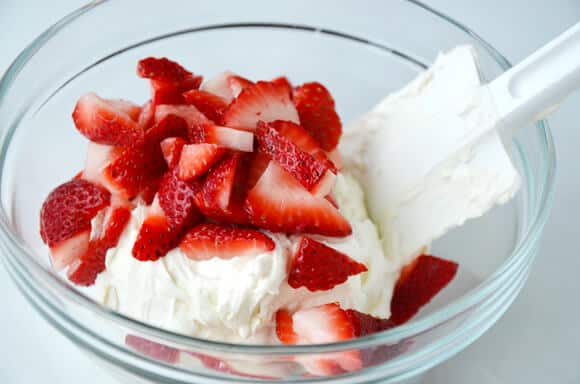
Strawberry Cheesecake Filling

Strawberry Cheesecake Chimichangas
Craving more? Sign up for the Just a Taste newsletter for a fresh serving of content delivered every week to your inbox! And stay in touch on Facebook, Twitter, Pinterest, and Instagram for all of the latest updates.
Disclosure: All opinions expressed are my own and I was not compensated monetarily for this post.

Strawberry Cheesecake Chimichangas

Yield: 6 servings
Prep Time: 25 min
Cook Time: 5 min

Ingredients:

1 (8-oz.) package cream cheese, at room temperature
1/4 cup sour cream
1 Tablespoon plus 1/4 cup sugar, divided
1 teaspoon vanilla extract
1/2 teaspoon fresh lemon zest
6 (8-inch) soft flour tortillas
1 3/4 cups sliced strawberries, divided
1 Tablespoon cinnamon
Vegetable oil, for frying
Equipment: toothpicks; deep-fry thermometer

Directions:

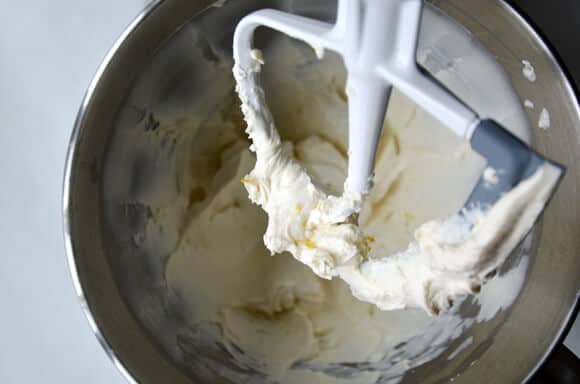
In the bowl of a stand mixer fitted with the paddle attachment, beat the cream cheese with the sour cream, 1 tablespoon sugar, vanilla extract and lemon zest, scraping down the sides of the bowl as needed. Fold in 3/4 cup of the sliced strawberries.
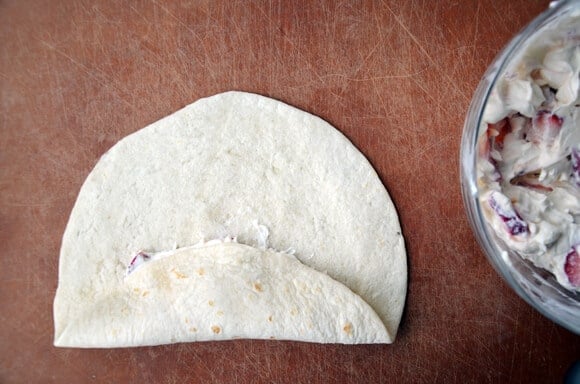
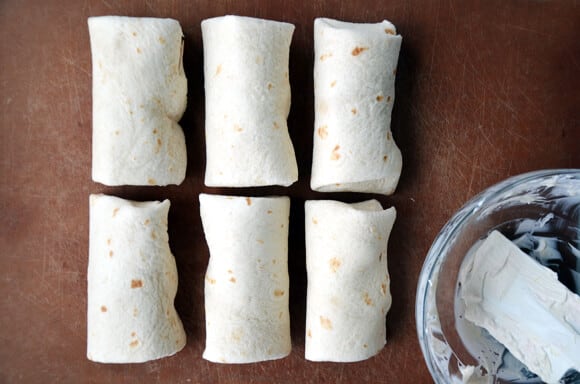
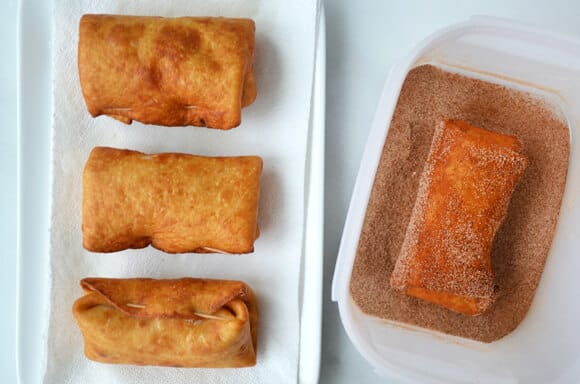
Divide the mixture evenly between the tortillas, slathering each portion in the lower third of each tortilla. Next, fold the two sides of each tortilla toward the center and then roll the tortilla up like a burrito and secure it with a toothpick. Repeat the rolling process with the remaining tortillas.
Combine the remaining 1/4 cup sugar with the cinnamon in a shallow bowl and set it aside. Line a large plate with paper towels.
Add 3 inches of oil to a large, deep saucepan, leaving a minimum of 2 inches from the top of the oil to the top of the saucepan. Heat the oil over medium-high heat until it reaches 360ºF on a deep-fry thermometer.
Working in batches, fry the chimichangas until golden brown and crispy, about 3 minutes, flipping them as needed. Transfer the chimichangas to the paper towel-lined plate to drain for 1 minute, and then roll them in the cinnamon and sugar mixture. Repeat the frying and rolling process with the remaining chimichangas, returning the oil to 360ºF between batches.
Remove all toothpicks from the chimichangas and transfer them to serving plates. Top each with a portion of the remaining 1 cup of sliced strawberries and serve immediately.
Recipe by Kelly Senyei of Just a Taste.

Chocolate Cupcake with Strawberry Buttercream

The last couple posts have been fairly healthy; a couple salads and a pasta salad. Even the smoked wings are fairly healthy except for the ranch dip, perhaps. Alas, I'm here to post a so not healthy recipe but it's a so very good recipe!! Recently, a friend turned 35, and I offered to bring something for her celebration. I was told that if I brought one of my baked goodies they would be very happy. I found out that our friend loves chocolate and strawberries. I've seen several recipes floating around for cupcakes with strawberry frosting, and I thought it would be the perfect thing to bake. I decided to use this chocolate cupcake recipe. But, I shouldn't have started cleaning my bathtub while the cupcakes were baking, because they ended up a tad overbaked. Doh! I don't think anyone noticed. Hopefully. I found thestrawberry buttercream from Sweet Lavender Bake Shop. It was quite scrumptious. Granted, the recipe calls for 4 sticks of butter! Yowza! Alas, this isn't a frosting you want to make every day, but once a year should suffice. Overall, I think the cupcakes were a big hit. The birthday girl approved, too! Enjoy! 


Ingredients:
Cupcake Batter:
1 3/4 cups all-purpose flour
2 cups sugar
3/4 cups good cocoa powder
2 teaspoons baking soda
1 teaspoon baking powder
1 teaspoon kosher salt
1 cup buttermilk, shaken
1/2 cup vegetable oil
2 large eggs, at room temperature
2 teaspoons pure vanilla extract
1 cup freshly brewed hot coffee

Strawberry Buttercream:
5 large egg whites
1 cup granulated sugar
Pinch of salt
4 sticks unsalted butter, almost room temp (cut into little cubes)
2 tsp vanilla extract
½-1 whole vanilla bean
3/4 cup fresh strawberry puree macerated with 2 tablespoons sugar

Preheat your oven to 350 degrees. Line 2 cupcake pans with cupcake liners. Set aside. Take the bowl from your standing mixture and add in the sugar, flour, cocoa powder, baking soda, baking powder, and salt. Mix together to combine. Take a medium sized bowl and add in your buttermilk, vegetable oil (I used canola oil), eggs, and vanilla. Stir. Slowly add the liquids to the dry ingredients while the speed of the mixture is on low. Once combined; slowly add in the coffee. Now, I was pretty concerned because the mixture was very liquidy (sorry, just made up a new word). Have no fear; just pour the mixture directly into your prepared cupcake liners. Bake for 18-22 minutes or until a toothpick comes out clean when inserted into the middle of a couple cupcakes. Remove from oven and cool completely. 

Now to make the strawberry buttercream; take out your blender and puree the strawberries. I used a pint of fresh strawberries. Measure out 3/4 of the strawberry puree and pour into a small bowl. Add 2 tbsp of sugar. Stir and set aside. Next, get out a medium sized saucepan and add water about half way. Bring to a boil. Add the bowl from your standing mixer to the saucepan to create a double boiler. Add the egg whites and sugar and whisk constantly until the sugar melts. This should only take a couple minutes if that. Remove the standing mixer and attach it back to the mixer. Attach your wire whisk and whisk the egg whites until they form stiff peaks. This takes about 10 minutes. Make sure they egg whites have cooled by touching the bottom of the bowl. Next, one square at a time add the butter into the egg whites. Continue to do this until the butter is fully incorporated. Add the vanilla and the vanilla bean. Lastly, add the strawberry puree to the mixture. Stir until full incorporated. Filly a pastry bag with a large star attachment and pipe onto the cooled cupcakes. Enjoy!

Giada's Lemony White Bean and Arugula Salad

I know! I know! I'm posting another salad recipe. But, it is summer after all, and I'm trying to get healthy. So, why not help you get healthy, too. Ha. In all seriousness, this is a really delicious salad. I found this recipe on The Food Network. And, it's a Giada recipe, so it has to be yummy, right? Right. Last year, I made a similar recipe here, but this one you eat on a crostini. Yeah, not as healthy, but just as scrumptious. For this salad, I added pine nuts to give it a bit more crunch, but I think it need even more of a crunch. Perhaps pecans would have worked better than the pine nuts. But, it certainly didn't take away from the flavor. The dressing was really good, too. I think I'm going to incorporate this dressing in more salads than just this one. Overall, I really enjoyed the salad, and I know I will be making it again. Enjoy! 


Ingredients:
Salad:
5 packed cups (5 ounces) arugula
1 (15-ounce) can cannellini or great Northern beans, rinsed and drained
1/2 small red onion, thinly sliced
3 tablespoons capers, rinsed and drained
3 tbsp Pine Nuts or Pecans (optional)

Dressing:
3 tablespoons fresh lemon juice (about 1 large lemon)
1 tablespoon maple syrup
1 teaspoon lemon zest
3 tablespoons extra-virgin olive oil
Kosher salt and freshly ground black pepper

Take out a small bowl, and add the lemon juice, lemon zest, and the olive oil. Add salt and pepper to taste, and whisk well. Set aside. To make the salad; take out a large bowl and add the salad, beans, chopped onions, capers (if using), and any nuts you may be using. Pour the dressing onto the salad, and toss to combine. Enjoy.

Roasted basil butter parmesan shrimp.

I’m making you a list today.
It’s called “Things We Need In Life” and has lots of important bullet points. Butter. Sunsets. S’mores. Wine. Bonfires. Air conditioning. Books.
Oh and peanut butter with spoons.
Stuff like that.
I’m working on another one too. Called “Things We Don’t Need In Life”… with a few more suggestions. Work. Broccoli. Fakeness. Sunday nights. NASCAR. Framed Scarface posters. Monday mornings. Snoring.
Ah and calories are on that list too. Who the heck needs calories?
They’re sort of like high school reunions or something. I mean, like why do we even need those today? Right? Helllllooo Facebook. Thanks to that wonderful stalking tool, I know every single thing about you, person I went to high school with. I know what color your painted your bedroom walls, what you ate for dinner two weeks ago, what your kids’ names are and the first time they used the potty (um, CAN WE PLEASE STOP THAT?! thanks.), where you live, the actual STREET which you live on (haven’t you learned anything about the scary internet?), the lyrics to your favorite sappy song, the lyrics to your favorite “I’m drunk” song, the deal you scored at Target last week, the deer that ate all the apples off your backyard apple tree, your every outrageous belief ranging from politics to religion to shopping and the shots of you on the beach that hinder on the edge of inappropriateness. By the way, WHY did you request me as a friend again? I wasn’t cool enough for you in high school, but now I’m cool enough to see the first pair of big-girl underpants you bought for your toddler? I think it’s ’bout time we reevaluate this relationship. A good place to start would be the “unfriend” button.
SO yeah… sorry… I don’t need to see your face in a bar and reunite from the last ten years. A reunion from when? Your last status update 20 minutes ago? I bet soooo much has happened since.
And P.S. I don’t need no stinking calories either.
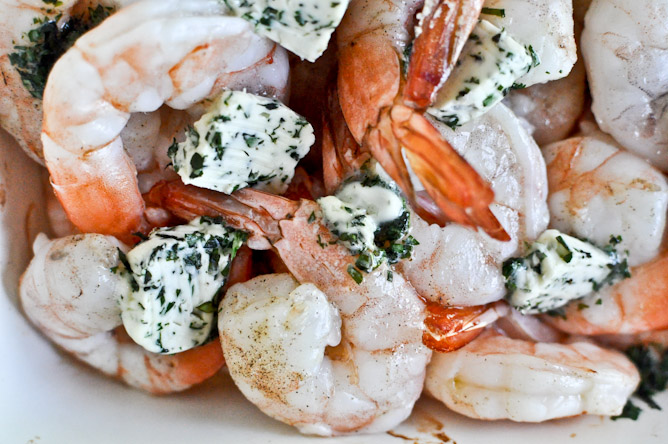
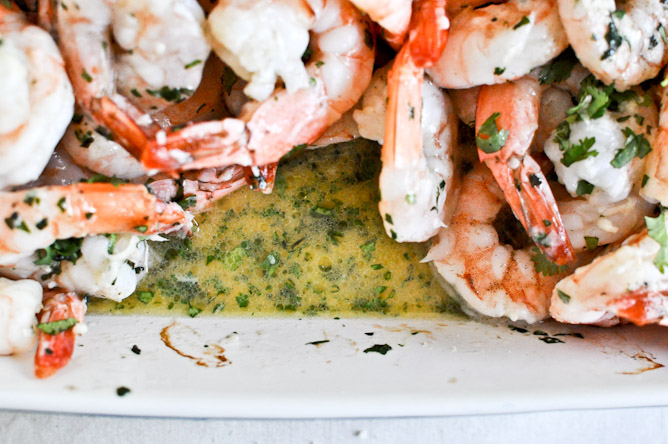
That’s why… I’m pretending my meals are calorie free from now on. I mean, I can delete things on Facebook so I’m just going to start deleting calories too. Starting with this shrimp. Because I added some green stuff to the butter, which essentially sucked out all of the calories and made it perfectly acceptable to add cold slices all over piping hot shrimp and watch them melt into rivers and streams. I can’t even. And that pool of herby, salted butter up there? Works wonders with a loaf of pull-apart bread. I learned that myself.
And the shrimp… it can go on pasta too. We did that. And we ate it on crostini. And then we ate it with even more butter. And you didn’t even know because I didn’t put it on Facebook. Who would’ve thought?

Roasted Basil Butter Parmesan Shrimp

ingredients:

6 tablespoons unsalted butter, at room temperature
3 tablespoons fresh chopped basil
2 pounds raw, peeled and deveined shrimp
1 1/4 teaspoon salt
1 teaspoon pepper
2 tablespoons olive oil
1/4 cup freshly grated parmesan
additional fresh basil and cilantro for sprinkling

directions:

Preheat oven to 425 degrees F.
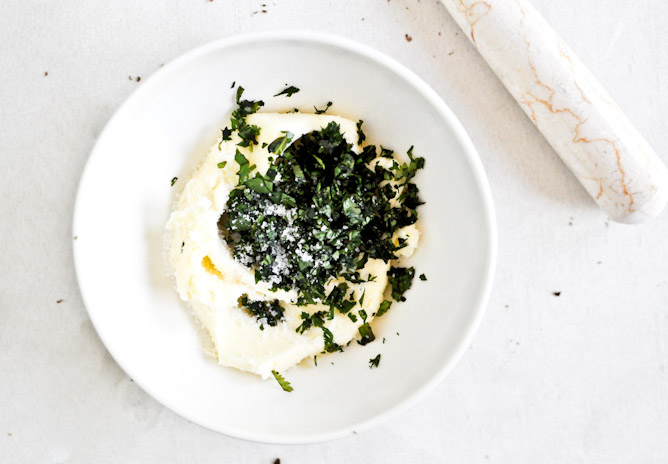
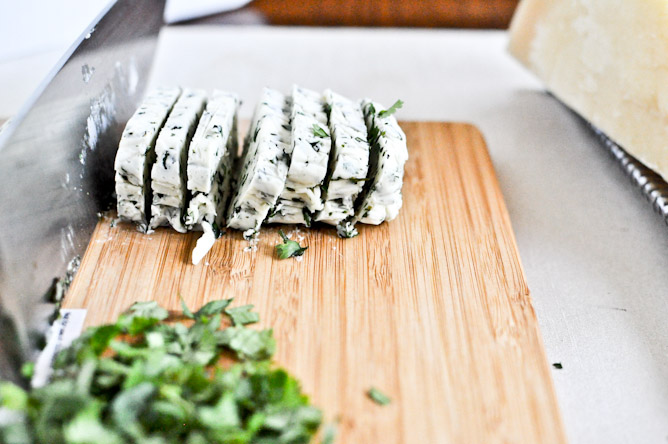
Combine butter, basil and 1/4 teaspoon salt together in a small bowl, mixing to combine. Place butter on a piece of plastic wrap, shaping it into a ball or a log and wrapping it up. Set in the fridge to harden.
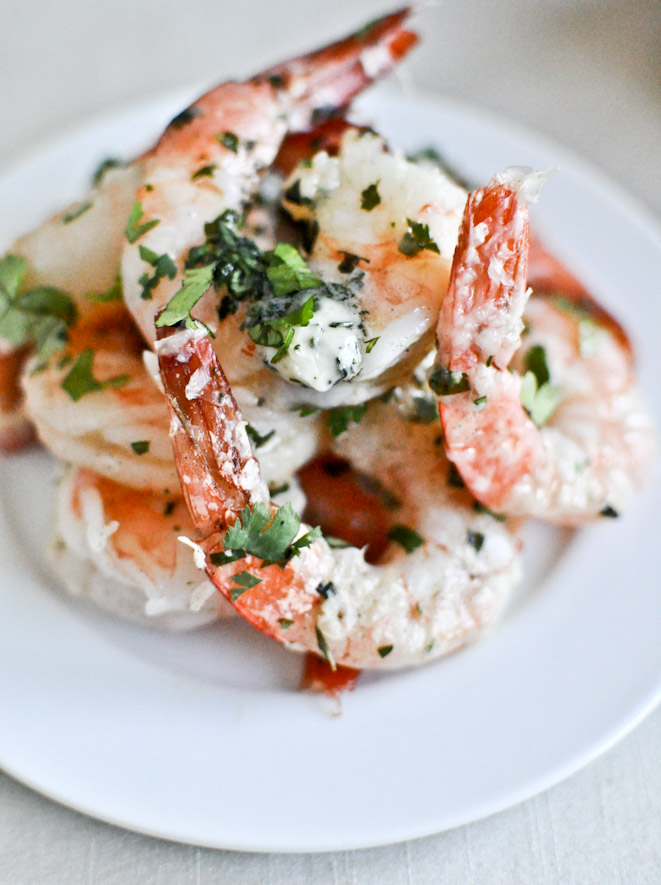
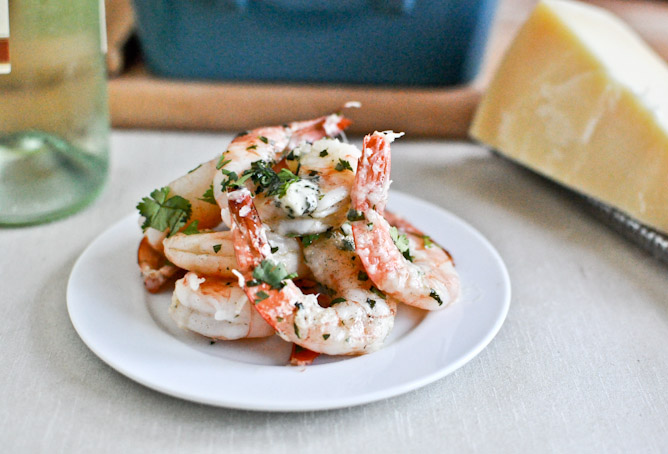
Add shrimp to a large baking dish. Cover in salt, pepper and olive oil, tossing to coat. Roast for 10-12 minutes (or longer or shorter for the size of your shrimp, I actually roasted mine for 15 minutes because they were super jumbo. Just keep an eye on them and the minute they are pink, remove from the oven.) then remove and slice basil butter over top. Cover in parmesan and another sprinkling of herbs, then serve immediately.
Oh… but I did put it on my blog. And THEN my blog’s Facebook. Does that count? Darnit.